
TL;DR: Gemini 3 revolutionizes AI-assisted web design by enabling innovative, production-ready interfaces with advanced typography, unique color palettes, sophisticated layouts, and precise corner control—moving far beyond generic outputs.
📋 Table of Contents
Jump to any section (16 sections available)
📹 Watch the Complete Video Tutorial
📺 Title: Gemini 3 changes everything for web design
⏱️ Duration: 2235
👤 Channel: DesignCode
🎯 Topic: Gemini Changes Everything
💡 This comprehensive article is based on the tutorial above. Watch the video for visual demonstrations and detailed explanations.
The era of generic, cookie-cutter AI-generated web designs is over. With the arrival of Gemini 3, designers and developers now have access to a tool that doesn’t just mimic—it innovates. From stunning typography and non-rounded corners to advanced scroll animations and dynamic light/dark mode transitions, Gemini 3 is redefining what’s possible in AI-assisted web creation. This isn’t just an incremental upgrade—it’s a golden era for web design, comparable to the Midjourney revolution in visual art.
In this comprehensive guide, we’ll unpack everything revealed in the original transcript: three powerful techniques to maximize Gemini 3’s potential, how to feed it high-quality inspiration, edit and animate designs like a pro, and seamlessly export your creations into real-world workflows. Whether you’re a designer, developer, or founder, this is your blueprint to leveraging AI not as a crutch—but as a senior-level creative partner.
Why Gemini 3 Is a Game-Changer for Web Design
Gemini 3 stands apart from predecessors like GPT-5.1 and Claude in several critical areas:
- Typography mastery: Handles large, expressive type with confidence
- Color innovation: Moves beyond safe palettes to “colors that are out of the ordinary”
- Layout sophistication: Excels at complex structures like floating elements and advanced grids that stump other models
- Corner control: Breaks the “rounded corners” cliché—produces sharp, non-rounded edges when appropriate
- Animation & interaction: Generates scroll-triggered effects, beam borders, and micro-interactions with remarkable fluency
- Light/dark mode parity: Previously strong in dark mode, now equally capable in light mode—and can remix between them
Most importantly, Gemini 3 puts you in the driver’s seat. It doesn’t just generate—it responds to your creative direction, adapting consistently across sections once you establish a visual language.
The Three Pillars of Mastering Gemini 3
The transcript outlines a three-part framework for unlocking Gemini 3’s full potential:
- Inspiration Feeding: Using reference images, code snippets, and design systems to guide output
- Precision Editing: Fixing errors, swapping assets, and adding advanced animations
- Workflow Integration: Exporting designs to tools like Figma, Cursor, or React apps
Let’s explore each pillar in depth.
Technique 1: Inspiration Feeding – The Foundation of High-Quality Output
Gemini 3 thrives on visual context. As the speaker emphasizes: “a picture is worth a thousand words”—especially when prompting AI for design.
Build a Curated Inspiration Library
Don’t rely on vague prompts like “create a landing page.” Instead, gather high-quality references from these sources:
| Platform | Best For | Pro Tip |
|---|---|---|
| Mobbin | Real-world UI patterns, animations, and section-specific designs | Use a Pro account to search by component (e.g., “hero section”) |
| Dribbble | Trendy, visually striking web designs | Filter by “Web Design” and focus on hero sections as wireframes |
| Contra | Modern portfolio and product UIs | Save designs that match your brand vibe |
| Panda | Aggregated design inspiration from Dribbble, Product Hunt, etc. | Search “product design” for holistic layouts |
| Affinity | Free design tool with interactive examples | Study its built-in interactions for animation ideas |
How to Feed Inspiration to Gemini 3
Once you’ve selected a reference (e.g., a Dribbble shot with a complex floating grid), follow this process:
- Take a screenshot of the design or section you admire
- Upload it directly into Gemini 3’s interface
- Write a precise prompt such as:
“Adapt this design for a chat app called ‘Aura.’ Change the text, names, and numbers. Use Iconify Solar Duo Tone for icons and SG Logos for company logos.”
- Specify asset libraries upfront to avoid generic AI-generated icons:
Iconify Solar Duo ToneSG Logos
This approach yields a design that’s inspired by—not copied from your reference, with intentional variations in layout angle, content, and iconography.
Technique 2: Precision Editing – From Good to Production-Ready
Even the best AI output needs human refinement. Gemini 3’s design mode enables granular control without touching code—unless you want to.
Visual Editing Tools
Within the design interface, you can:
- Delete elements: Select and press delete
- Swap images: Choose from categories like “abstract”
- Change icons: Replace with specific types (e.g., “file” icon)
- Modify text: Update copy, names, and numbers
- Adjust fonts: Change size, weight, and family
Adding Advanced Animations
This is where Gemini 3 truly shines over competitors like GPT-5.1, which “struggles with animations and interactions.” To add effects:
- Enter Design Mode
- Select the target element (e.g., a button)
- Use a prompt like:
“Animate border beam using yellow”
- Gemini 3 generates only the code for that element, but with full context of the entire HTML codebase
For scroll-based animations, use prompts like:
“Apply animate on scroll and animate keyframe”
This ensures consistency across all animated elements—a common pain point in manual implementation.
Remixing Templates for Rapid Iteration
Combine multiple inspirations for breakthrough results:
- Select a base template (e.g., a dark-themed layout with cards)
- Prompt:
“Keep the cards but change the rest” - Gemini 3 intelligently fuses the card style with a new layout, preserving border beams, spacing, and interaction patterns
The result? A cohesive, original design that feels like it was crafted by a senior designer who understood your vision.
Technique 3: Workflow Integration – Exporting Beyond the AI Sandbox
Your design is ready—now what? Gemini 3 (via Aura) supports multiple export paths:
Export Options
| Format | Use Case | Limitations |
|---|---|---|
| HTML Download | Direct use in static sites or as a React/Vue base | None—full fidelity |
| Copy to Figma | Handoff to design teams, further refinement | Animations and interactions become static; ~90% fidelity |
| Cursor IDE | Convert to React with AI-assisted coding | Requires manual setup of component structure |
Figma Export Walkthrough
- Click “Copy to Figma” in Aura
- Paste into Figma
- Result includes:
- Full layer hierarchy
- Auto-layout frames
- Accurate spacing and typography
- Manually add advanced effects (e.g., liquid glass) using Figma plugins
Mastering Backgrounds and Visual Effects
Gemini 3’s built-in asset library elevates designs beyond basic gradients.
Background Best Practices
When selecting backgrounds:
- Avoid visual competition: Backgrounds should not interfere with foreground content (e.g., headings, text)
- Prioritize empty space: Areas of low visual density behind key elements
- Adjust saturation and brightness: Ensure text remains legible
- Use blur sparingly: Too much blur loses detail and impact
Advanced Background Techniques
Using Unicorn Studio (integrated with Aura):
- Create a custom background with glyphs, gradients, or abstract shapes
- Export it and copy the unique ID
- Paste the ID into Aura to embed it
- Further refine with:
- Blend modes (e.g., “screen” to reduce visual weight)
- Positioning (use “absolute” to fix to hero section, not scroll)
Leveraging Aura’s Unique Design Features
Aura (the platform used in the demo) provides tools most design apps lack:
Border Gradients
Unlike Figma or Sketch, Aura includes native border gradient controls:
- Adjust angle, opacity, and color stops
- Use to create liquid glass effects on buttons and cards
- Preset combinations for quick experimentation
Advanced Drop Shadows
Go beyond basic shadows with:
- Diagonal shadow angles
- Multi-layer shadow presets
- Tailwind-compatible code output
Creating Stunning Presentation Mockups
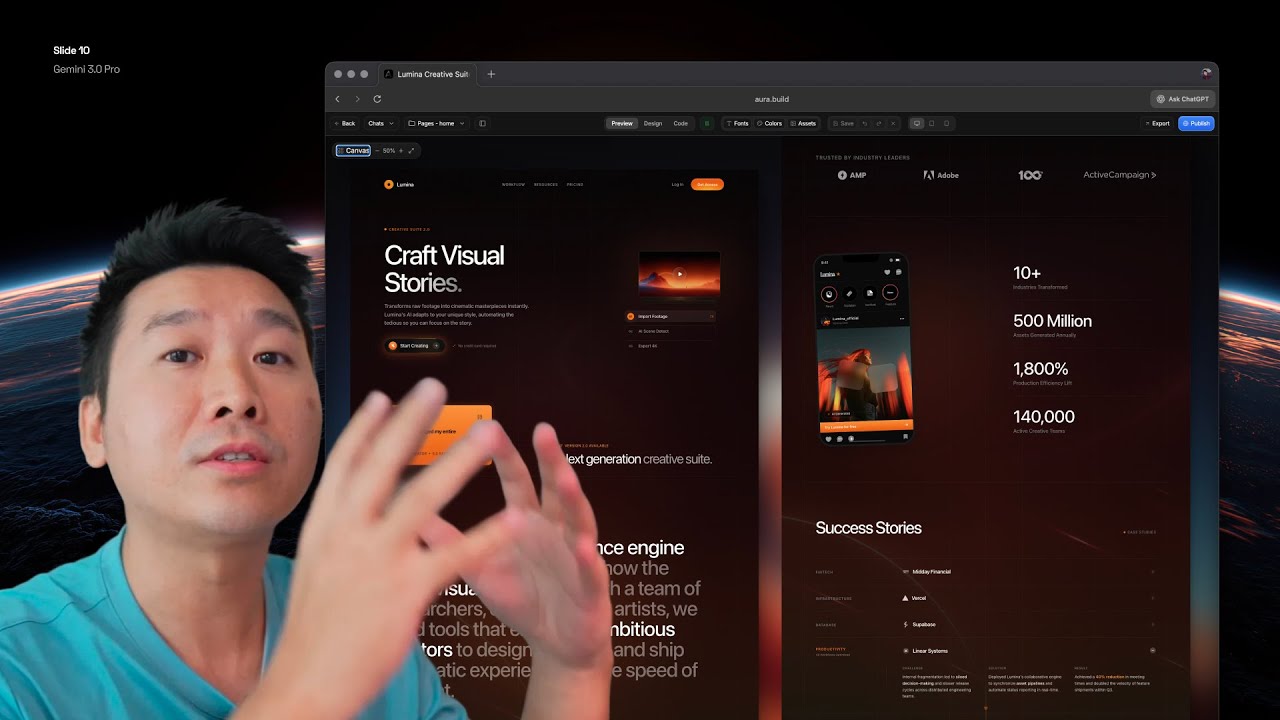
Share your designs professionally with Aura’s built-in canvas tool:
- Click “Preview” → “Canvas”
- Select a device preset (e.g., desktop)
- Customize:
- Corner radius
- Ring thickness
- Background (color or image)
- Use abstract landscape images for contrast against dark UIs
- Take screenshots for portfolios or social media
Responsive Testing and Debugging
Gemini 3 automates a traditionally tedious process:
- Test layouts across iPad, mobile, and desktop breakpoints
- Identify issues like misaligned elements or overflow
- Regenerate the full page to “clean up HTML” and fix inconsistencies
As the speaker notes: “Usually back in my day, we spent so many hours fixing for different browsers, different mobile resolutions.” Now, AI handles the heavy lifting.
The Critical Role of Human Expertise
Despite AI’s power, the speaker stresses: “The human part is extremely important.” Your design knowledge enables you to:
- Curate high-quality inspiration
- Write precise, effective prompts
- Manually fix edge cases (e.g., position issues in animations)
- Understand Tailwind class semantics (e.g., “mb-4”, “font-medium”)
- Make aesthetic judgments (e.g., background vs. foreground balance)
AI is a collaborator—not a replacement. The more you know, the better you can direct it.
Tools and Resources Mentioned
Here’s a complete list of tools referenced for your workflow:
| Tool | Purpose | Link/Note |
|---|---|---|
| Gemini 3 | AI design generation | Use with precise prompts and references |
| Aura | Design platform with editing, assets, and export | Where the demo takes place |
| Unicorn Studio | Background and effect creation | Embed via ID in Aura |
| Mobbin | UI pattern library | Pro account recommended for search |
| Dribbble | Design inspiration | Focus on hero sections |
| Cursor | AI-powered code editor | For React conversion |
| Figma | Design handoff and refinement | 90% fidelity on import |
| Affinity | Free design tool with interactions | New alternative to Figma |
Step-by-Step: From Inspiration to Published Design
Follow this end-to-end workflow:
- Collect inspiration from Mobbin/Dribbble; screenshot a hero section
- Upload to Gemini 3 with prompt: “Adapt for [product]. Use [icon library].”
- Edit visually: swap images, fix text, delete unwanted elements
- Add animations: select element → “animate border beam”
- Apply background: choose from Aura assets or embed Unicorn Studio ID
- Test responsiveness: check mobile/iPad views; regenerate if needed
- Export: copy HTML or send to Figma
- Create mockup: use Canvas tool for social sharing
- Publish: deploy static HTML or convert to React in Cursor
Troubleshooting Common Issues
When things go wrong:
- Animation inconsistency: Regenerate the entire page to reset HTML structure
- Layout breaks on mobile: Use responsive preview to identify overflow or alignment issues
- Wrong icon style: Specify exact library in prompt (e.g., “Iconify Solar Duo Tone”)
- Background overwhelms content: Reduce saturation, increase blur, or change blend mode to “screen”
Future-Proofing Your AI Design Skills
The speaker’s closing advice: “To be able to know how to use AI is so incredibly important.” Invest in:
- Building a personal inspiration library
- Learning Tailwind CSS semantics
- Understanding web layout principles (positioning, z-index, responsive breakpoints)
- Mastering prompt engineering for design (“adapt,” “in the style of,” “keep X but change Y”)
Conclusion: Embrace the Golden Era
Gemini 3 isn’t just another AI tool—it’s a paradigm shift. By combining curated inspiration, precise human direction, and seamless workflow integration, you can produce web designs that are not only beautiful but also technically robust and brand-consistent.
The key takeaway? Don’t prompt generically—steer creatively. Give Gemini 3 the style, the references, and the specific instructions it needs, and it will reward you with output that feels less like AI and more like a seasoned design partner who’s been with your team for years.